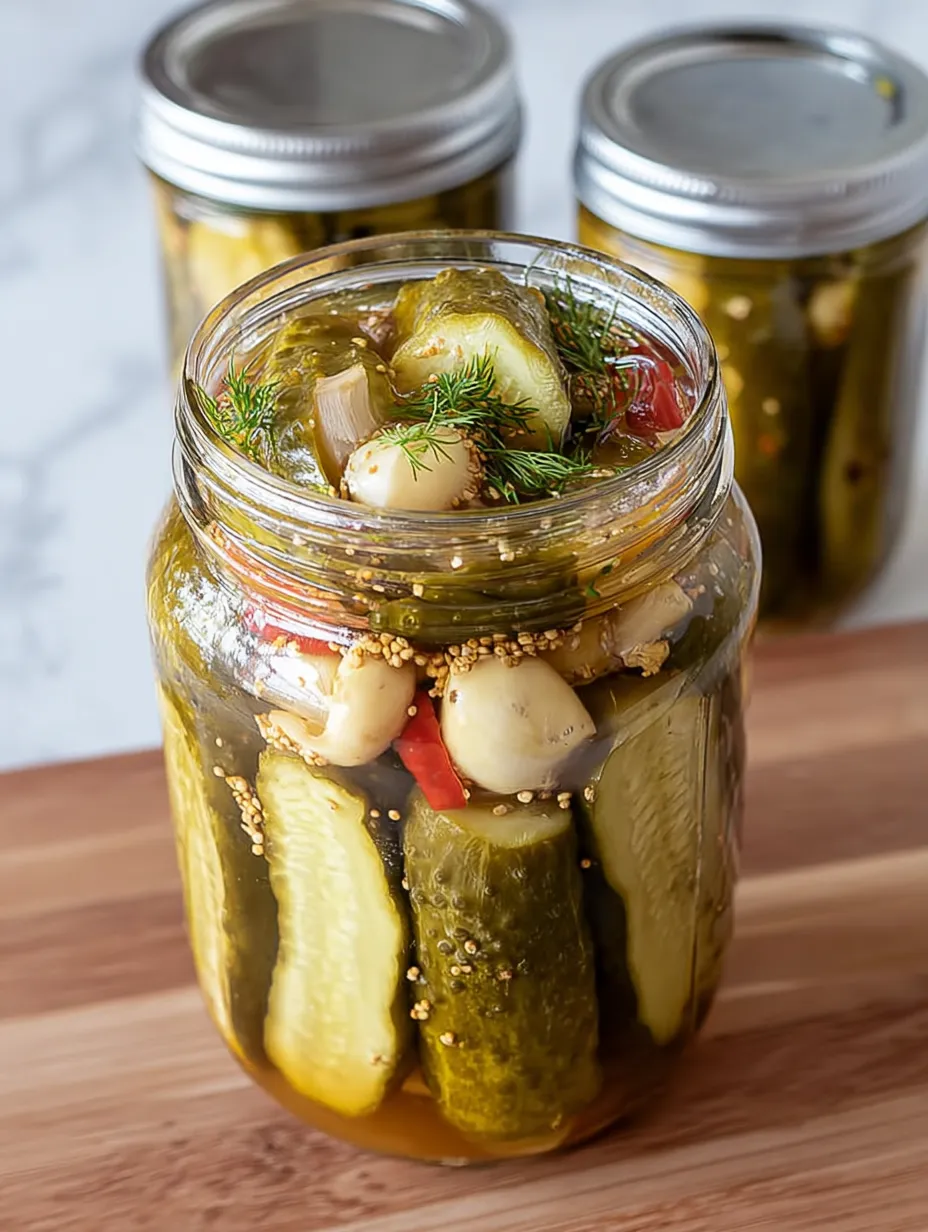
Every summer, when the garden cucumbers start piling up on the counter and the scent of fresh dill fills the kitchen, I get that itch to pull out my jars and make pickles. Not just any pickles crisp, garlicky, no-soggy-in-sight kind of pickles. The kind that snap when you bite into them and make you feel a little proud every time you open a jar.
This recipe is one I’ve refined over time, inspired by my grandmother’s handwritten notes and upgraded with a brilliant low-temperature canning method from America’s Test Kitchen. It’s not the fastest process, but it’s incredibly rewarding. If you’ve ever been disappointed by mushy homemade pickles, this one’s about to become your go-to.
Why These Pickles Are Worth Making
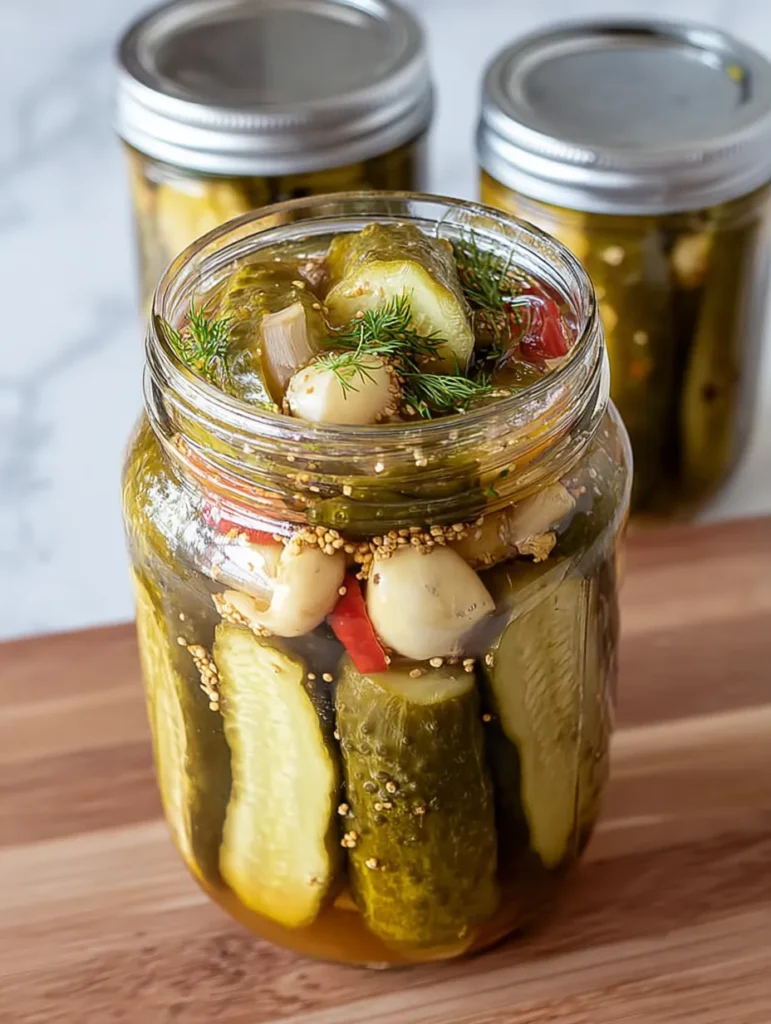
There’s something deeply satisfying about tucking away jars of homemade pickles. These are everything you want in a dill spear bright, briny, full of garlic and dill flavor, and most importantly, still crunchy after months in the pantry.
They’ve got a beautiful golden tint thanks to turmeric, and just a touch of sweetness that rounds out the tang of the vinegar. The bell pepper gives the jars a colorful pop, and the mustard and dill seeds add that little extra something that makes every bite more interesting.
They’re perfect for topping sandwiches, stacking on burgers, or honestly, just grabbing straight from the jar.
Here’s What You’ll Need
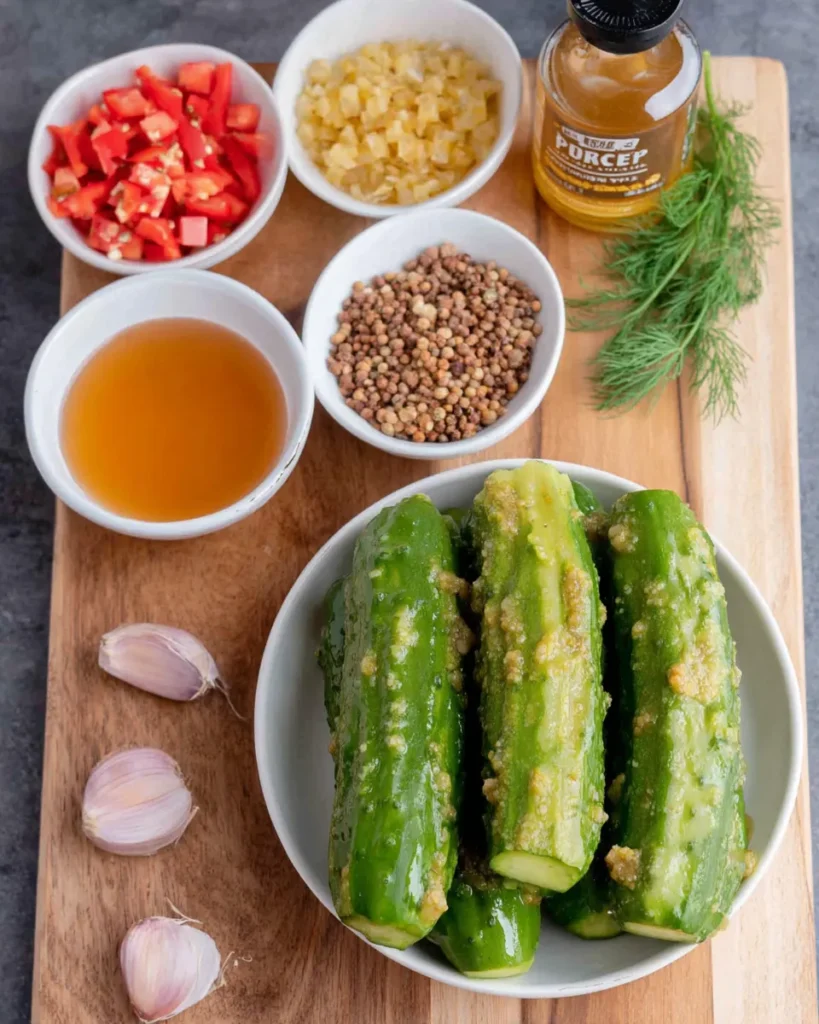
- 2½ pounds pickling cucumbers, trimmed and quartered lengthwise into 4-inch spears
- 2 tablespoons canning and pickling salt
- 2 cups chopped fresh dill, plus 4 large dill sprigs
- ½ red bell pepper, chopped or sliced into thin strips
- 3 cups apple cider vinegar
- 3 cups water
- ¼ cup sugar
- 1 tablespoon mustard seeds (I like to use half yellow, half brown)
- 1 tablespoon dill seeds
- ¾ teaspoon ground turmeric
- ½ teaspoon Ball Pickle Crisp (optional, but recommended for extra crunch)
- 4 garlic cloves, peeled and halved
Gear That Makes It Easier
If you’ve done any canning before, you probably have most of these on hand:
- Four clean pint-sized jars with new lids and bands
- A waterbath canner with a rack
- Jar lifter and canning funnel
- Instant-read or candy thermometer
- Cheesecloth and twine for the dill sachet
- A wooden skewer or something to remove air bubbles
Ingredient Swaps and Options
I love that this recipe is flexible. Here are some easy changes you can make:
- Swap apple cider vinegar for white vinegar if you want a sharper, more traditional pickle flavor.
- Use honey instead of sugar for a slightly deeper, floral sweetness.
- No Pickle Crisp? No problem. You can skip it if you salt the cucumbers well.
- Use yellow or orange bell peppers if that’s what you’ve got on hand.
- Want more heat? Add a few chili flakes or slices of jalapeño to each jar.
Let’s Make Pickles
1. Start by salting the cucumbers.
Toss them in a big bowl with the pickling salt and refrigerate for 3 hours. This step pulls out excess moisture and helps them stay crisp. When time’s up, drain them and pat them dry. Don’t rinse just dry them off with a clean towel.
2. Get your jars ready
Place them on the rack in your canner, fill the pot with water to cover the jars by about an inch, and bring it to a simmer. Then turn off the heat and leave the jars in the hot water so they stay warm.
3. Warm your lids and bands
Put them in a small pot of water and simmer gently. Don’t let them boil, just keep them warm.
4. Make the brine
Bundle your chopped dill into a cheesecloth sachet and tie it up. In a large saucepan, combine the dill sachet with the bell pepper, vinegar, water, sugar, mustard seeds, dill seeds, and turmeric. Bring it all to a boil, then turn off the heat and keep it covered to stay hot.
5. Pack the jars
Lay a towel on your counter. Using your jar lifter, remove the jars from the hot water, pouring the water back into the canner. Add ⅛ teaspoon of Pickle Crisp to each jar, if you’re using it. Then pack in a fresh dill sprig, two garlic halves, and enough cucumbers to fill the jar snugly.
4. Fill the jars with brine
Reheat the brine to a quick boil, remove the sachet, then use a funnel and ladle to pour the hot liquid over the cucumbers. Leave about ½ inch of headspace at the top. Use a wooden skewer to gently press around the edges to release any trapped air. Add more brine if needed.
5. Seal the jars
Wipe the rims with a clean, damp cloth. Place the lids on, then screw the bands on until just fingertip-tight.
6. Process the jars
ower them into the canner and bring the water to between 180 and 185°F. This is crucial don’t let it boil. Use your thermometer and maintain that temperature for 30 minutes.
7. Cool and store
Lift the jars out and set them on a towel on your counter. Let them sit undisturbed for 24 hours. Once they’re completely cool, remove the rings, check the seals, and store the jars somewhere cool and dark. They’ll keep beautifully for up to a year.
A Few Helpful Tips
- Don’t skip the salting step it’s key to keeping the cucumbers from turning soft later.
- Keep an eye on your temperature. This low-temp method is what keeps everything crunchy.
- Give them at least two weeks to cure before opening a jar. It’s worth the wait.
- Always label your jars with the date so you know when to enjoy them at their best.
How to Store Them
As long as your jars are properly sealed, they’ll last in the pantry for up to 12 months. Once opened, pop the jar into the fridge and use within about four to six weeks. They’ll stay crisp and flavorful the whole time.
A Quick Bit of Pickle History
Dill pickles have been part of American food traditions for generations, but their roots go much deeper, from Eastern Europe to the Middle East. This recipe honors that heritage while using a clever method that helps preserve the texture we all love. It’s the perfect example of how old-school recipes can still evolve in modern kitchens.
Frequently Asked Questions
Do I have to use Pickle Crisp?
Not at all. It helps keep them crisp, but salting the cucumbers well and following the right process will still give you great results.
Can I use regular cucumbers instead of pickling cucumbers?
You can, but pickling cucumbers are firmer and have fewer seeds. Regular ones might turn out a bit softer.
Why use low-temperature pasteurization?
This method is gentle and helps keep the cucumbers crisp. A full rolling boil can actually make them soft, which is the opposite of what we want.
How long before I can eat them?
Give them two weeks to sit and soak in all that flavor. They get better with time.
Final Thoughts
There’s something so satisfying about lining up freshly canned jars on your shelf, knowing they hold the crisp, tangy rewards of your labor. These dill pickles are a far cry from store-bought versions they’re fresh, flavorful, and crunchy in a way that just feels homemade.
Print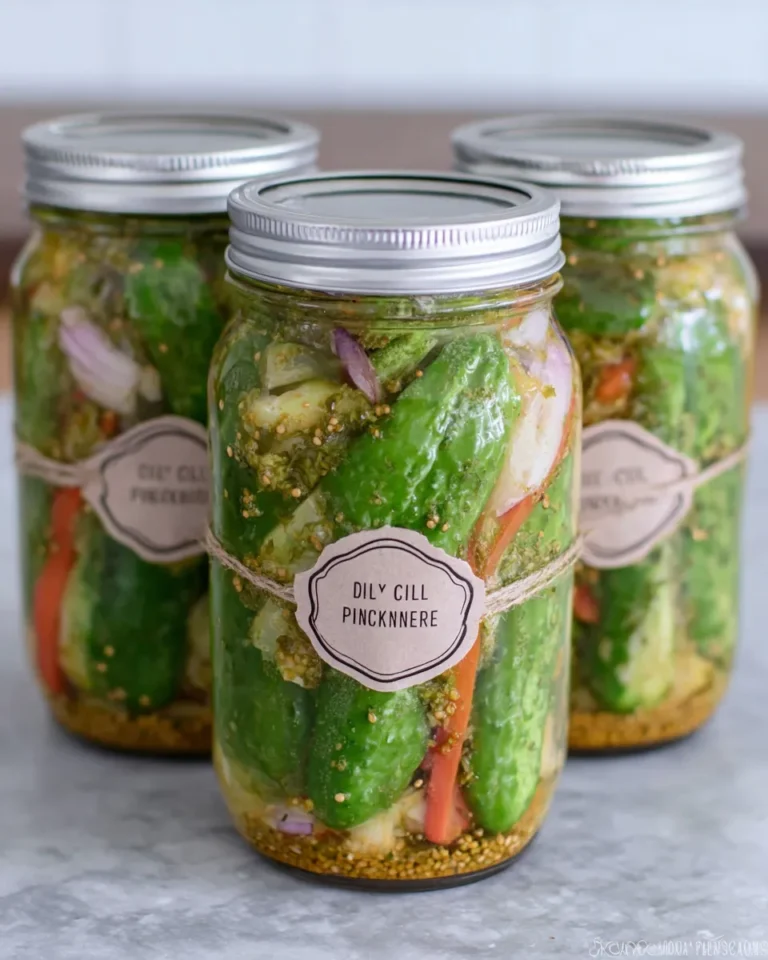
Crispy Dill Pickle Canning Recipe
This Crispy Dill Pickle Canning Recipe is packed with garlic, fresh dill, mustard seeds, and turmeric. With a low-temperature pasteurization process, every spear stays crisp and tangy for months.
- Total Time: 4 hours
- Yield: 4 pint jars 1x
Ingredients
2½ lbs pickling cucumbers, quartered lengthwise into 4-inch spears
2 tablespoons canning and pickling salt
2 cups chopped fresh dill, plus 4 large dill sprigs
½ red bell pepper, chopped or thinly sliced
3 cups apple cider vinegar
3 cups water
¼ cup sugar
1 tablespoon mustard seeds (half yellow, half brown)
1 tablespoon dill seeds
¾ teaspoon ground turmeric
½ teaspoon Ball Pickle Crisp (optional)
4 garlic cloves, peeled and halved
Instructions
1. Toss cucumber spears with pickling salt in a bowl. Refrigerate for 3 hours, then drain and pat dry without rinsing.
2. Place clean jars in a waterbath canner. Cover with water and bring to a simmer. Turn off heat and keep jars warm.
3. Simmer lids and bands in a separate small pot of water (do not boil).
4. Bundle chopped dill in cheesecloth. In a large saucepan, combine sachet, red bell pepper, vinegar, water, sugar, mustard seeds, dill seeds, and turmeric. Bring to a boil. Cover and keep warm.
5. Remove jars from water. Add ⅛ tsp Pickle Crisp to each, then pack with dill sprigs, garlic, and cucumbers.
6. Bring brine back to a boil. Remove sachet. Fill jars with brine, leaving ½-inch headspace. Remove air bubbles with a skewer and adjust brine if needed.
7. Wipe rims, place lids on, and screw bands to fingertip tight.
8. Lower jars into canner. Heat water to 180–185°F and hold for 30 minutes. Monitor temperature closely.
9. Remove jars and let cool for 24 hours. Check seals and store for up to 1 year.
Notes
Pickling salt draws out moisture and improves crunch. Do not skip salting or reduce time.
Low-temperature pasteurization (180–185°F) keeps the pickles crisp. Use a thermometer for accuracy.
Let pickles cure at least 2 weeks before eating for best flavor.
Refrigerate opened jars and consume within 4–6 weeks.
- Prep Time: 3 hours 30 minutes
- Cook Time: 30 minutes
- Category: Preserving
- Method: Canning
- Cuisine: American
Nutrition
- Serving Size: 1 spear
- Calories: 15
- Sugar: 1g
- Sodium: 290mg
- Fat: 0g
- Saturated Fat: 0g
- Unsaturated Fat: 0g
- Trans Fat: 0g
- Carbohydrates: 3g
- Fiber: 0g
- Protein: 0g
- Cholesterol: 0mg
Keywords: crispy dill pickle canning recipe, homemade pickles, canning dill pickles